|
Seafox Retrofit Tether
|
|
|
 |
|
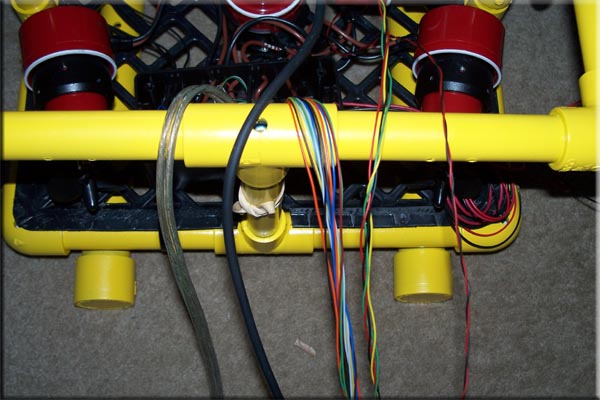
On the old Tether power to each pump was sent down a doubled up pair of 24 gauge phone wires, so I used 2 wires for the positive connection to each pump and a double common ground for all the pumps. I knew the 24 gauge wire was small so I hoped doubling them up would overcome the voltage drop at the same time allowing the Tether to still be light and flexible. Even with only a 50' Tether voltage drop was still a problem which caused the Rov to be underpowered.
This time I was able to retain all of the same wires used on the old Seafox Tether and just reutilize them. I added one new 16 gauge pair for main power and the old 24 gauge phone wires are now used to control the Relays and Compass. This is the new Make Up of the Tether, it consists of (from the left) one pair of 16 Gauge speaker wire for Main Power, the Camera Cable, Twenty 24 Gauge wires (phone wire) - (14) are Relay Control wires, (4) are Compass Signal wires, (2) are Spares for some future add on. The Tether on the Seafox is not detachable at the Rov it is permanently attached. |
|
|
 |
|
|
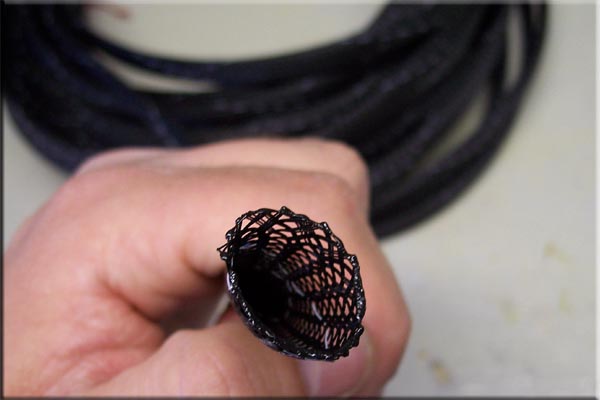 |
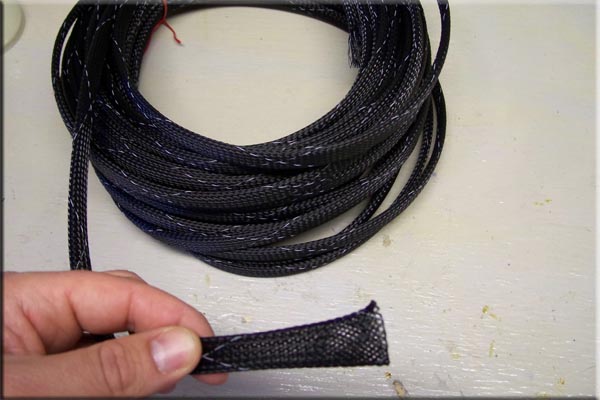
| The old 3/8" Spiral Wrap was too tight with the additional pair of 16 gauge wires and the tether would have been to stiff so I had to find something else to bundle everything together. I found this stuff at my local electronics store, which they called Expando Sleeving, I call it Snake skin because it feels like it and the way you feed it over the bundle of wires it looks like a snake eating something, you get this big bulge you have to work down the entire length of the tether as you go. |
|
|
 |
|
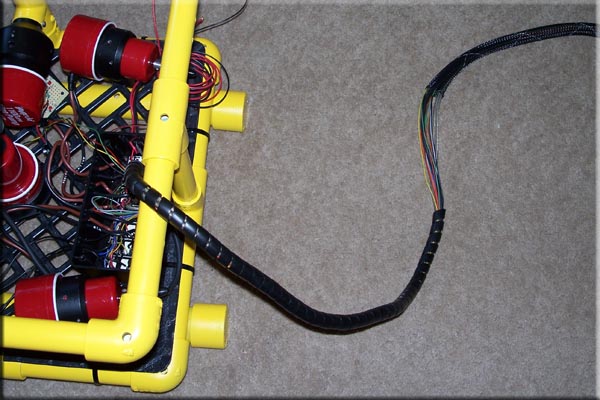
I did keep a few feet of the Spiral Wrap on the Tether closest to the Rov just to act as a strain relief so when I pick the Rov up by the tether the wires will not be pulled from the control box.
|
|
|
 |
|
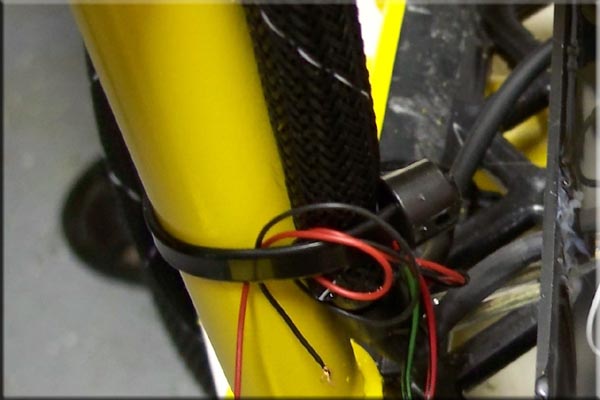
The Tether is secured to the Frame with a few zip ties.
|
|
|
 |
|
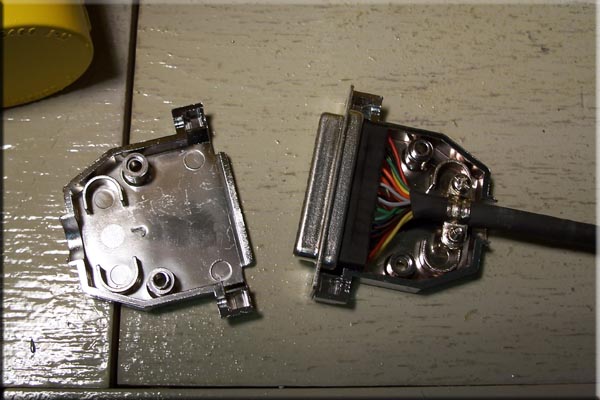
The other end of the Tether is detachable at the Control Box so it is easier to transport. I used a 25 pin computer plug to achieve this. (Power is Not fed through the plug.)
|
|
|
 |
|
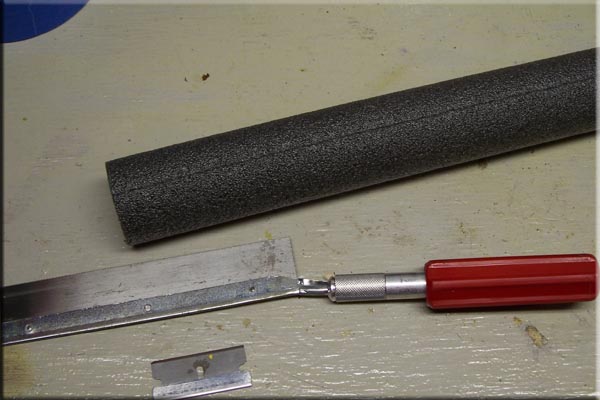
To make the Tether neutral buoyant I once again used Pipe Insulation. This is not the best method because it is open cell foam and it will compress and become water logged at depth. I will have to come up with another solution later on but for now it will have to work.
|
|
|
 |
| I start by cutting out a section of a length of the Pipe Insulation so that the sections will fit snugly around the Tether. |
|
|
 |
|
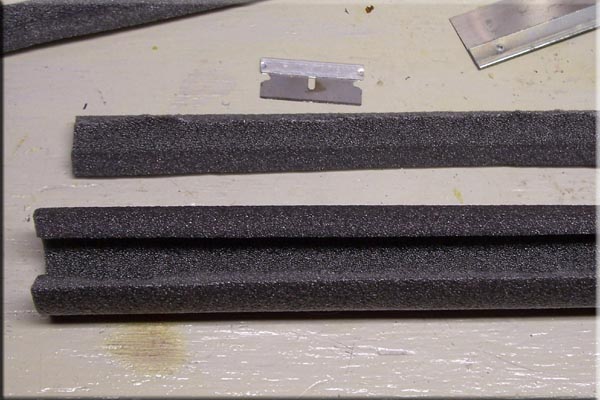
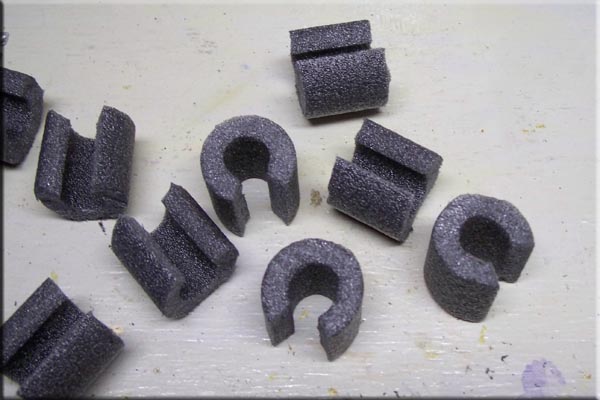
Next I cut that length into about 1 1/4" sections.
|
|
|
 |
|
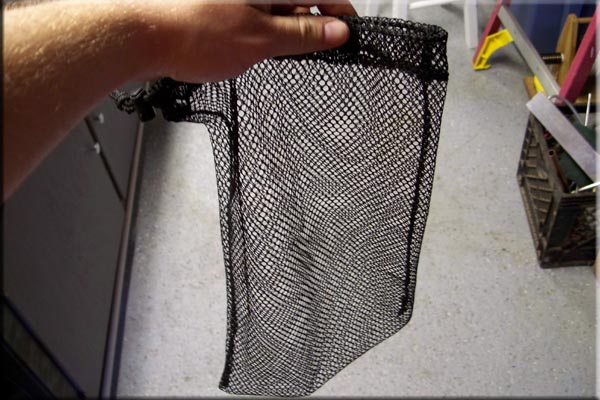
To figure out the amount of floats I need to add to the Tether I start by stuffing the Tether into a mesh bag and submerging the bag into my test tub.
|
|
|
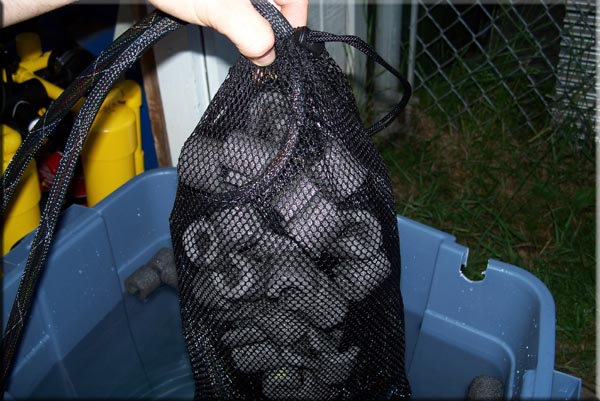 |
| Next I keep stuffing in a few floats at a time until I get the entire Bag to just barely float. Then I just divide the number of floats used by the length of the tether for the float spacing. Final spacing will be done in the field. |
|
|
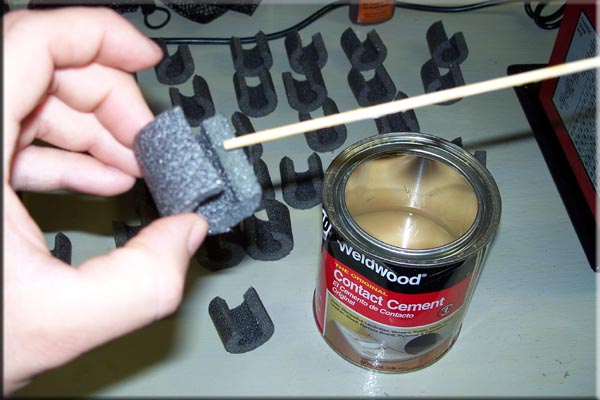 |
| Using a scrap piece of wood I spread contact cement onto the edges of each float. After a hour or so the floats and easily be wrapped around the Tether and the edges stuck together. |
|
|
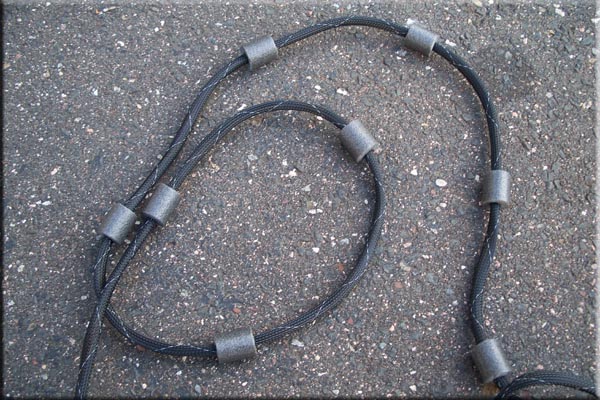 |
| The Floats can be slid on the tether in the field to get the right buoyancy of the entire Tether. Once the proper spacing is found the floats can be held in place with thin safety wire.
Update - The Pipe Insulation did not work DO NOT even bother trying it, once it gets wet it will not provide the same buoyancy. Next I will test out Closed Cell Foam. |
|
|
 |
| All Information, Pictures, and Material is copyright © 1998-2009 by Stephen Thone and may not be used for any personal or commercial purposes without the consent of the author. All rights reserved. The Author makes no guarantees or warranties as to the accuracy or completeness of, or results to be obtained from accessing and using the Information herein. | |||